Jev Integration in Next.js and TypeScript Projects: Step-by-Step AI Router Setup
Originally published in Turkish. Read the original →
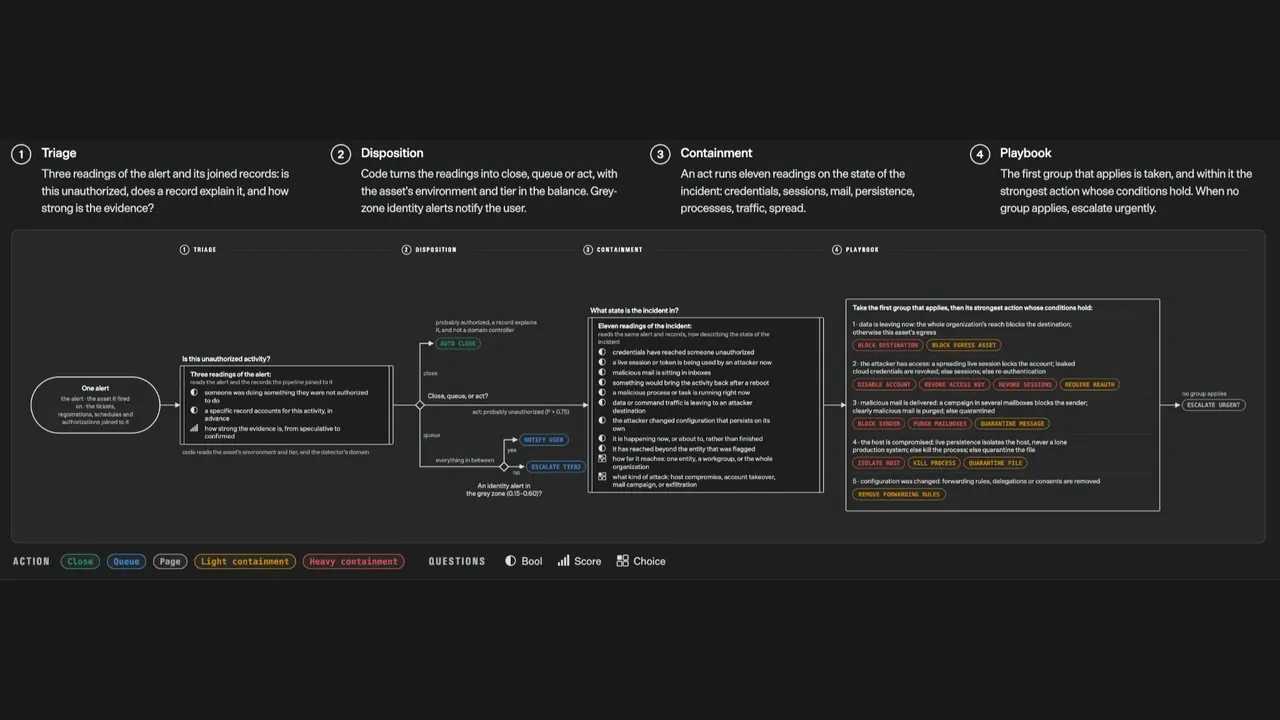
We build, step by step, a type-safe AI Router architecture that classifies incoming user requests with the Jev decision model before sending them to large language models in modern Next.js and TypeScript web applications.
The most common architectural mistake when building AI features in a modern Next.js application is sending every user request straight to the most expensive and slowest large language model (LLM). Yet a significant share of incoming requests can be solved with a simple database query, a ready answer from the cache or a much lighter downstream service. What you need is a type-safe AI Router layer that looks at the content of the request within milliseconds and picks the right route.
The Jev decision model developed by TypeSafe AI, as its maker's name suggests, carries a perfect philosophical fit with the TypeScript ecosystem. In our earlier How to use Jev post we covered the basic concepts of decisions and thresholds. In this guide, we look step by step at how to design an end-to-end routing and triage architecture in a Next.js (App Router) project.
Architecture Design: What Should the Request Flow Look Like?
When a Next.js Route Handler (app/api/assistant/route.ts) or Server Action is triggered, the flow should go through four core stages:
1. Hard Rules: If the requester isn't signed in or there is a known general outage in the system, deterministic code runs directly without asking the AI at all.
2. Jev Decision Layer (Triage & Disposition): The user message and session state are sent to Jev. In around 100 milliseconds, Jev returns both the target route (Choice) and the urgency/risk score (Score).
3. Confidence Gate: If the returned confidence score is below the set business threshold, the request falls back to the safe default route (human_support or fallback_llm).
4. Action (Playbook): Depending on the selected route, the relevant microservice, database query or generative language model is called.
Step 1: Defining the TypeScript Types and the Decision Schema
When working with Jev, we use union types with firm boundaries instead of open-ended string types. Let's start by creating a module called lib/jev-router.ts in our project:
export type RouteTarget =
  | 'sql_analytics'
  | 'rag_documentation'
  | 'billing_action'
  | 'frontier_coding_llm'
  | 'human_escalation'

export interface RouterInputState {
  userMessage: string
  accountTier: 'free' | 'pro' | 'enterprise'
  hasOpenInvoice: boolean
  recentErrorCount: number
}

export interface JevRouterDecision {
  target: RouteTarget
  confidence: number
  urgencyScore: number
  requiresHumanReview: boolean
}
The most important point to note here is that the input state (RouterInputState) is stripped of unnecessary chat history. Jev shows its best calibration performance with focused, structured state data.
Step 2: The Decision Function and Calibration Thresholds
Not every route has the same cost of error. For example, the cost of mistakenly sending a user to documentation search (rag_documentation) is low; but the cost of mistakenly putting them on the automatic invoice refund (billing_action) route is high. That is why defining dynamic, per-route confidence thresholds is the healthiest approach:
const ROUTE_THRESHOLDS: Record<RouteTarget, number> = {
  billing_action: 0.92,
  sql_analytics: 0.85,
  frontier_coding_llm: 0.80,
  rag_documentation: 0.70,
  human_escalation: 0.0,
}

export function resolveSafeRoute(decision: JevRouterDecision): RouteTarget {
  if (decision.requiresHumanReview) {
    return 'human_escalation'
  }

  const requiredConfidence = ROUTE_THRESHOLDS[decision.target]
  if (decision.confidence < requiredConfidence) {
    // If the confidence score is below the route's threshold, fall back to the safe harbor
    return 'human_escalation'
  }

  return decision.target
}
As we stressed in our Jev vs traditional LLMs analysis, thanks to Jev's RLCD training, a 0.92 confidence score it gives is not a random guess but a calibrated probability that corresponds to a 92% hit rate in the real world.
Step 3: Using It Inside a Next.js Route Handler
Now let's bring this structure together in app/api/router/route.ts. When a request comes in, we first get the Jev decision with timeout protection, then wake the heavy models only when needed:
import { NextResponse } from 'next/server'
import { resolveSafeRoute, type JevRouterDecision, type RouterInputState } from '@/lib/jev-router'

export async function POST(request: Request) {
  const body = (await request.json()) as RouterInputState

  try {
    // Low-latency call to the Jev decision service (example abstraction)
    const decision: JevRouterDecision = await evaluateWithJev(body, {
      timeoutMs: 600,
    })

    const safeTarget = resolveSafeRoute(decision)

    return NextResponse.json({
      routedTo: safeTarget,
      metrics: {
        confidence: decision.confidence,
        urgency: decision.urgencyScore,
      },
    })
  } catch {
    // Never take a random action on a timeout or network error
    return NextResponse.json({
      routedTo: 'human_escalation',
      fallback: true,
    })
  }
}
Multimodal (Image) Decision Support in Jev 1.14
With the Jev 1.14.0 update released by TypeSafe AI, it became possible to include images in this routing architecture as well (through the assets map). For example, you can verify in your Next.js backend whether a screenshot a user attached to a support request really contains a payment error, or whether an uploaded product photo shows damage, again without generating text, directly with the Bool and Score types.
In the end, positioning Jev as a pre-check and routing layer in Next.js and TypeScript projects is one of the cleanest engineering ways to bring your application's response speed down to the level of standard web APIs while keeping your LLM costs under control.