Restoring Old Photos with Gemini: Colorization and Sharpening Prompts
Originally published in Turkish. Read the original →
Ready-made codes for repairing a yellowed, scratched or black-and-white photo in Gemini. The goal isn't to turn the face into someone else but to make the existing photo legible.
Bringing an old photo back to life and generating a new portrait are not the same job. In a code for restoring old photos with Gemini, the model isn't allowed to draw freely. The face, hairline and framing are preserved. What changes is the scratches, fading and blur. Codes for portraits from scratch are in the Gemini photo-making codes post. The codes here depend on the photo you upload.
Attach the photo to the message and paste the code below it. Don't delete the do not change the face line.
No real family photo was used in the examples below. First, a scratched, faded "old print" was generated with Gemini. Each step was applied to the previous output.
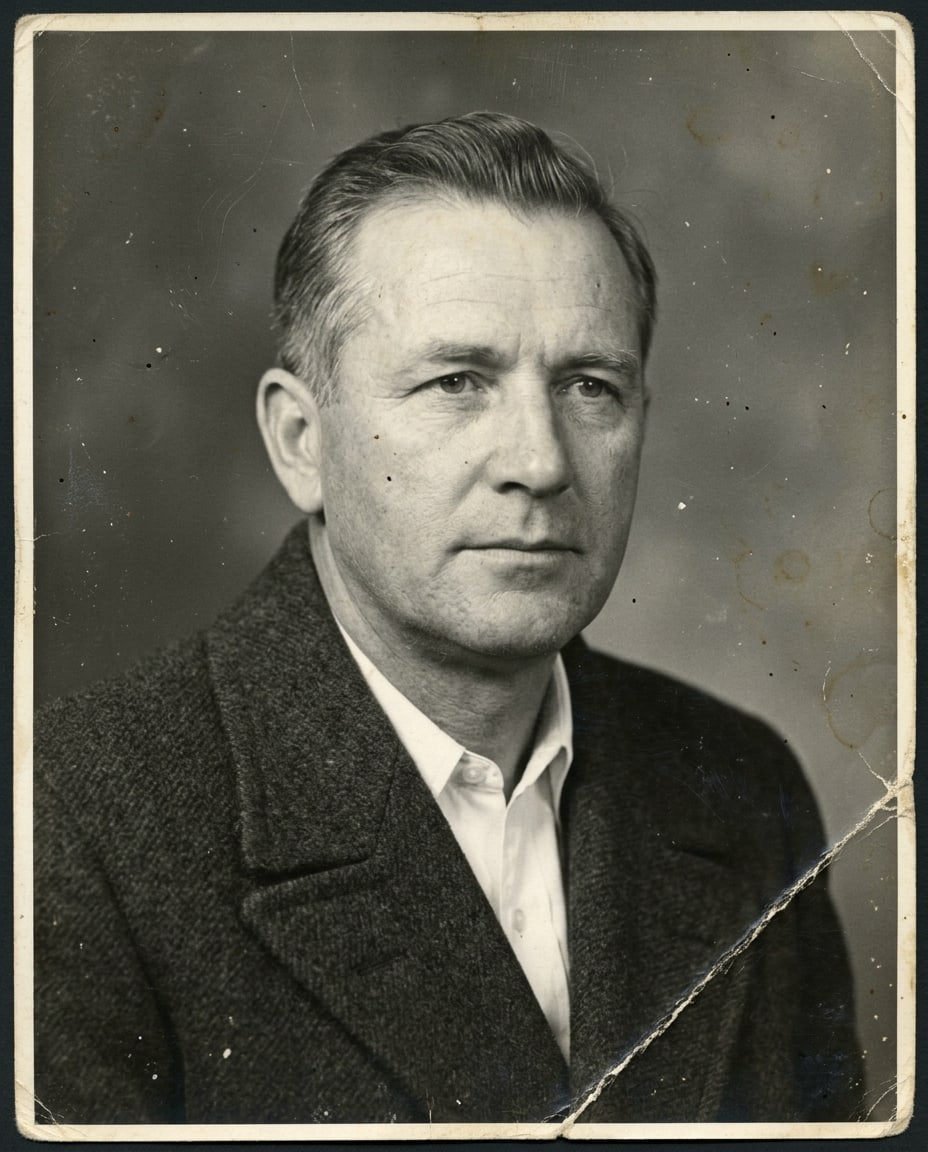
Sample input: a black-and-white print with scratches, dust and a broken corner.
Cleaning scratches and dust
Restore this photograph. Remove dust, scratches and small stains. Keep the same person, same face shape, same expression, same clothing and same crop. Do not beautify, do not change age, do not add makeup. Natural film grain may stay. Faithful restoration, not a new portrait.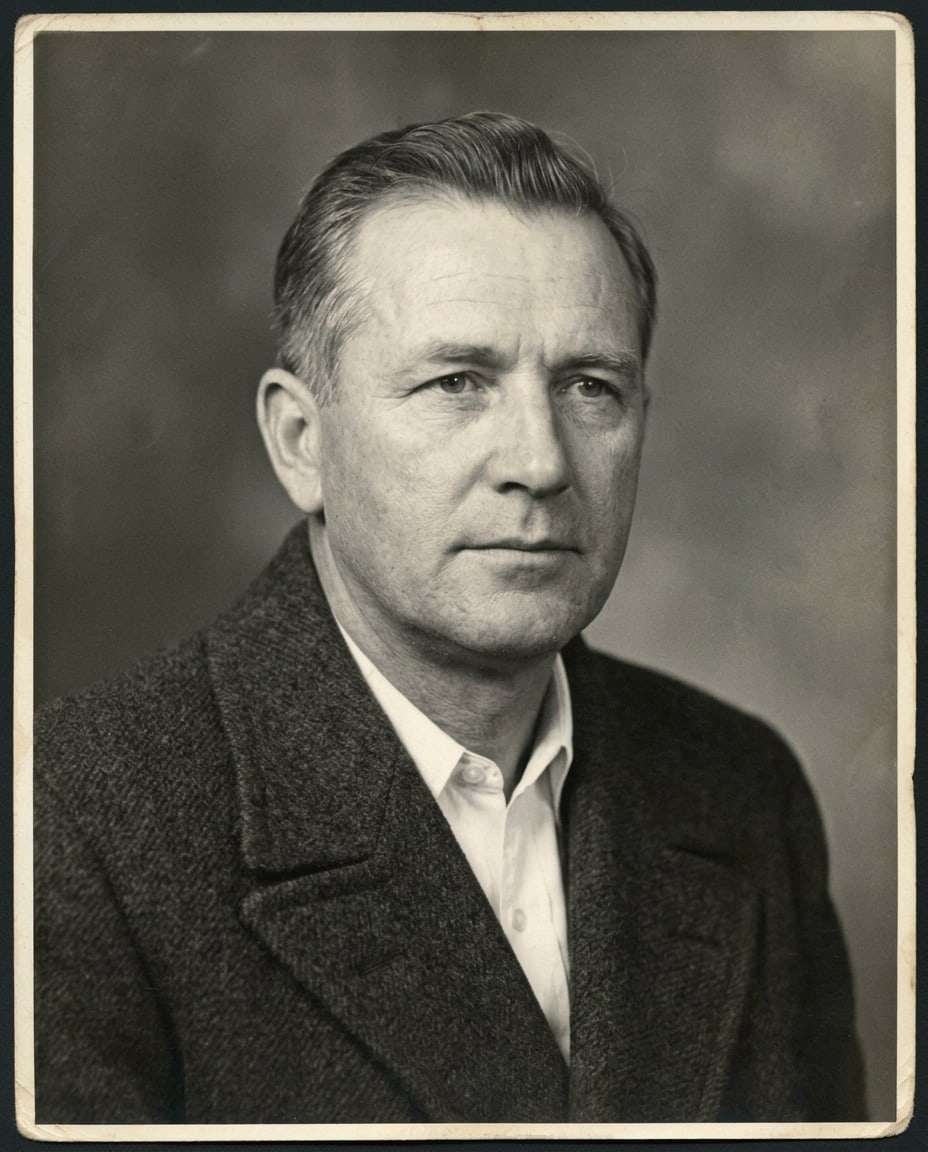
Gemini (Nano Banana 2.1) output. The input is the sample photo above.
This code doesn't brighten the color. It targets only the stains. If you want both jobs done, clean it first, then give the photo you like to a second message and colorize it.
Colorizing black and white
Colorize this black and white photograph. Keep the identical face, pose, clothing cut and background. Natural muted colors, realistic skin, no orange tan, no modern fashion. Period-appropriate color, soft contrast, do not invent new objects.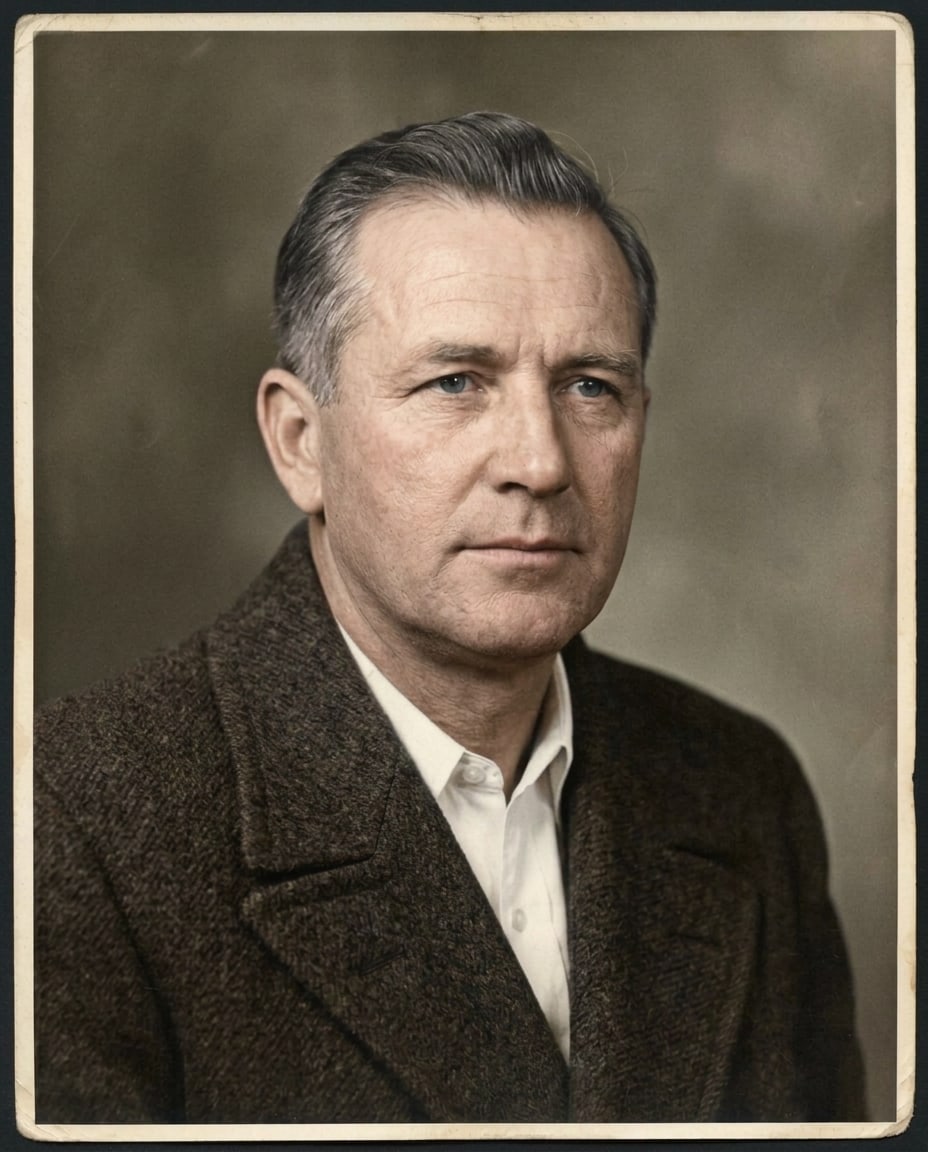
Gemini (Nano Banana 2.1) output. The input is the cleaned photo. The coat is dark wool brown. was added to the code.
If you know the color of the clothing, add it: the coat is dark wool brown. If you don't, the model guesses. A guess is not archival fact. Say so when you show it to the family.
Sharpening a blurry photo
Sharpen this blurry photograph slightly. Recover eyes and hair edges without inventing detail. Keep the same identity, same expression and same background. No plastic skin, no extra teeth, no changed jewelry. Subtle clarity, realistic scan of an old print.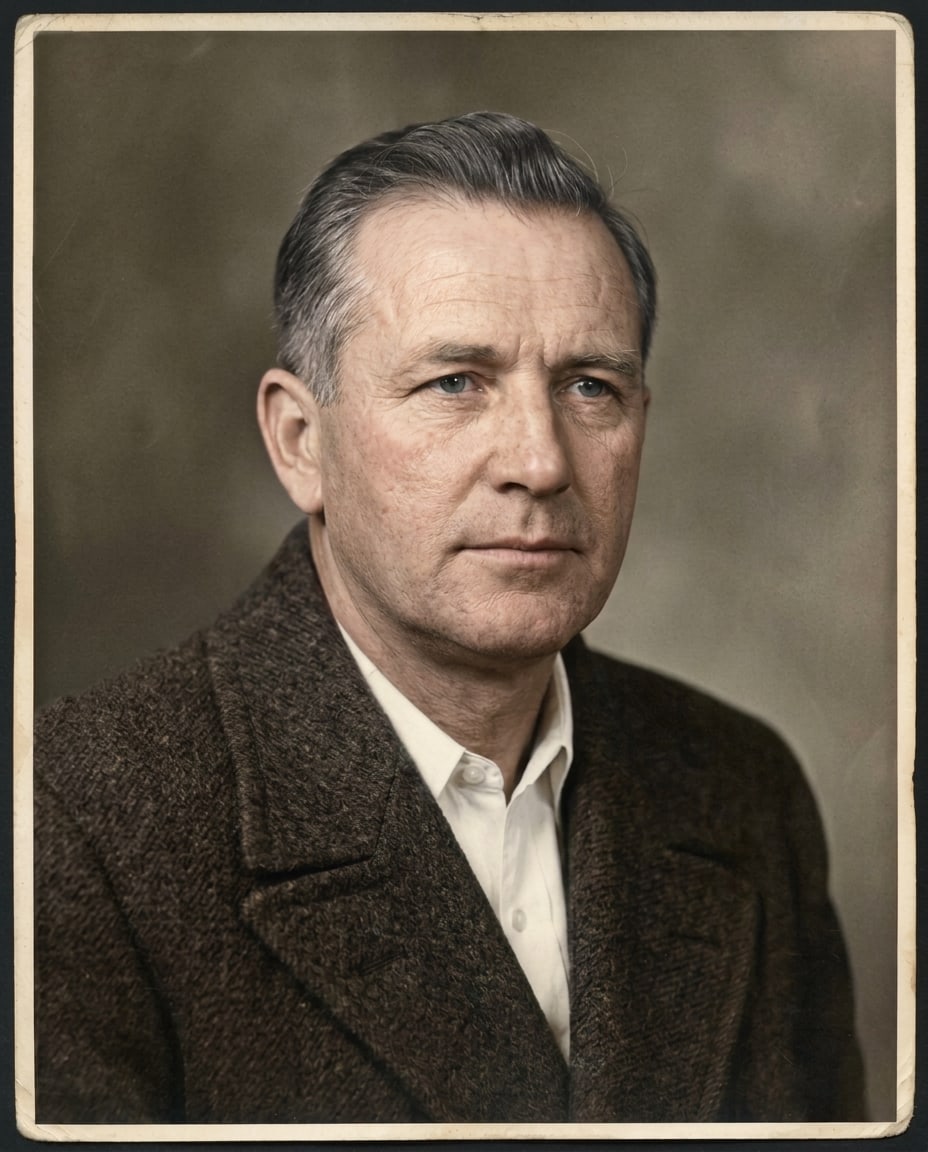
Gemini (Nano Banana 2.1) output. The input is the colorized photo.
The word slightly matters. Aggressive sharpening invents eyelashes and teeth. If the eyes are turning into a new person, don't rerun the code. Repeat it with a weaker sharpness sentence.
Fixing yellowed color
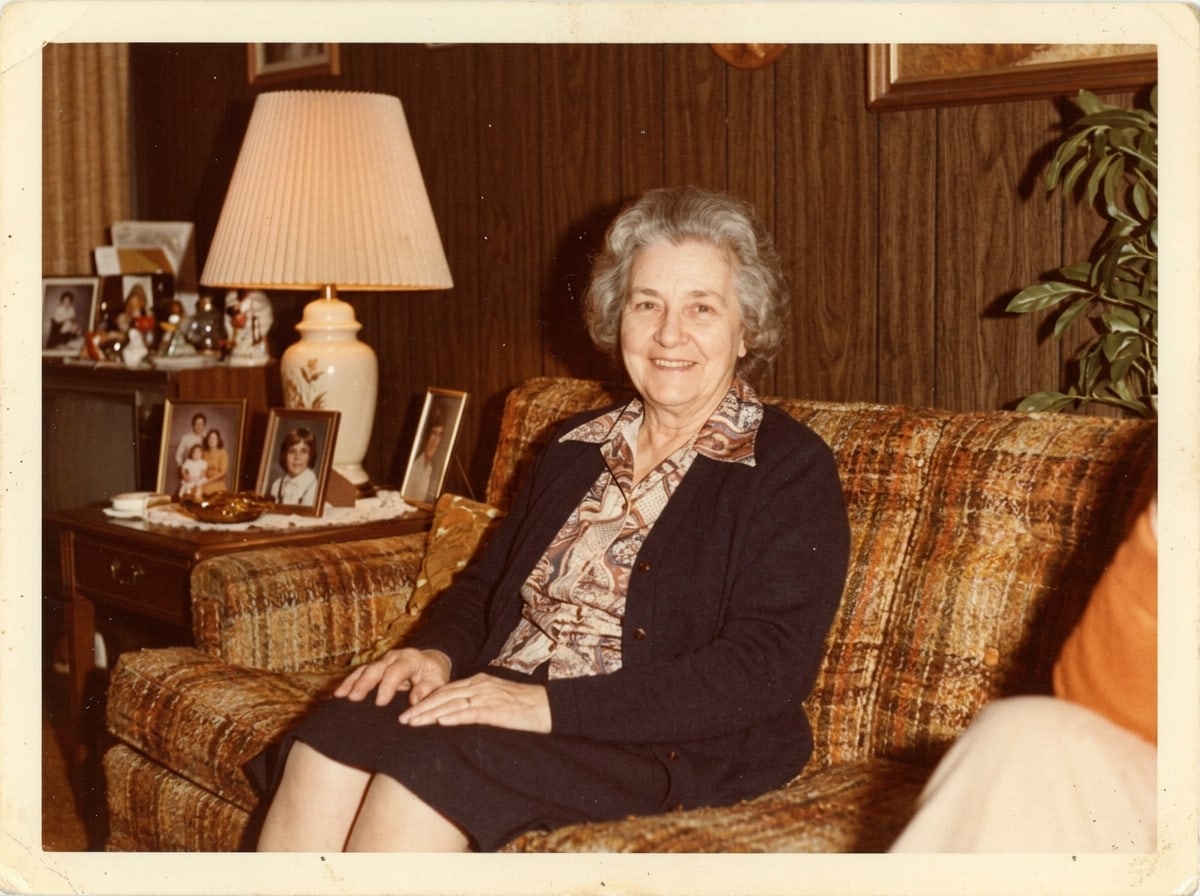
Sample input: a 1970s print whose color has shifted to yellow.
Correct the yellow fade of this color photograph. Restore neutral whites and natural skin. Keep faces, clothes and the room unchanged. No relighting, no new objects, no background replacement. Honest color correction of an old print.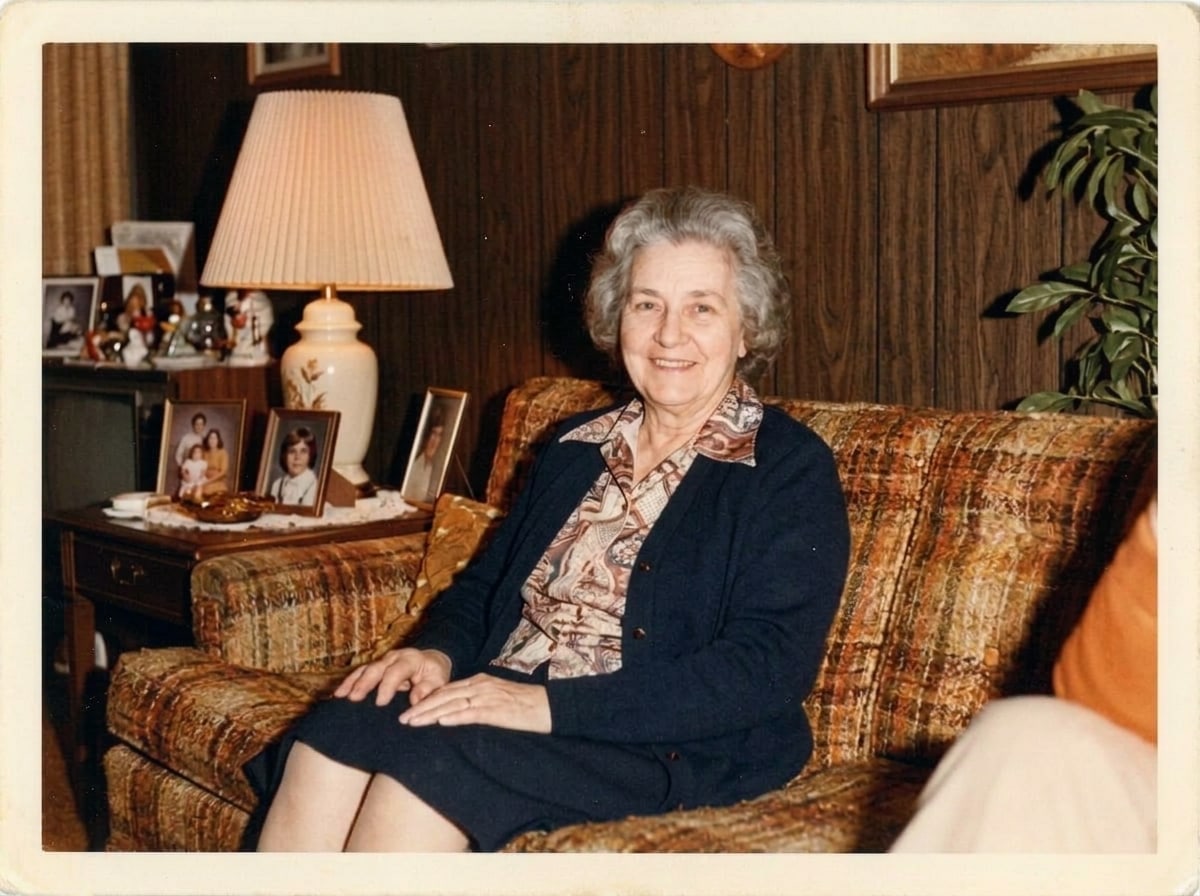
Gemini (Nano Banana 2.1) output. The input is the yellowed sample photo above.
Codes that replace the background with a modern room are outside the scope of this job. When the background changes, the person changes too. In a restoration, the room stays where it is.
Which photo to give it
Straight, front-facing, single-person photos break less. At a crowded wedding table, the model mixes up the faces. Crop to a single person first, then run the code. Don't delete the original file. The generated photo is a copy.
In a group photo, restoring each face one at a time is more reliable than restoring everyone in the same shot. The model may write new identities onto the small faces in the back. Asking it to restore a small face without enlarging it doesn't work either. Then detail gets invented.
Don't break the order
Cleaning, colorizing and sharpening are three separate requests. If you put all three in one code, the model redraws the face while it wipes the stains. The right order is: scratches first, download the photo you like, upload it in a new message and fix the color, and last, and only if needed, ask for slight sharpening. At every step, give it the previous output, not the original. Going back to the original every time brings back the stains you already fixed.
Keep the intermediate photos. If the final photo breaks, going back two steps is shorter than starting over.
Edges and borders
An old print may have a white card border, a date stamp or writing at the edge. Decide before you remove these. For an album, keep the stamp. For sharing, you can write keep the white border, remove only stains inside the image. If you say crop tight, the composition changes along with the stamp.
If two people are in the same photo, strengthen the code with keep both faces unchanged. The model sometimes sharpens one face and softens the other. If both faces break equally, split the photo in two and restore each half separately, then put them side by side. Don't leave this merging job to Gemini. The seam produces a made-up room.
When to stop
Stop if the whites of the eyes are too bright, the number of teeth has changed or an earring has moved. The next attempt will amplify it. Remove every word meaning sharpen or beautify from that step's code. If it still breaks, that photo isn't suitable for this job. In small, dark photos with one eye closed, the identity is already weak. Forcing it produces a new portrait.
For a family album, this is enough. For identity, heritage or news photos, keep the original negative separately and don't present the generated photo as the original.