How to Make ID Photos with Gemini: Copy-Paste Prompt Codes
Originally published in Turkish. Read the original →
Ready-made codes to paste into Gemini for a biometric ID photo, a LinkedIn portrait and a simple identity photo. Just replace the square brackets with your own description.
The Gemini photo-making codes that show up in searches don't end with a single generic portrait. People want ID photos, résumé shots and profile pictures: plain background, facing forward, nothing overdone. The codes below are for that kind of framing. For more general templates, see the Gemini photo-making codes post, and for freer portraits, the realistic photo prompts.
Change the square brackets. Leave the lighting, lens and background sentences where they are. Gemini's image engine reads these technical sentences more consistently in English. If you want, you can add a short note in your own language as one line at the end of the code.
Biometric ID photo on a plain background
For application practice and identity shots. Mouth closed, shoulders in frame, no pattern in the background.
Passport-style ID photo of a [adult woman / adult man], facing the camera, neutral closed-mouth expression, both eyes open, head upright, shoulders square. Even frontal lighting, no shadows on the face, plain light grey background, no jewelry, no glasses glare. Shot on 85mm lens, f/8, sharp eyes, natural skin texture with visible pores, no beauty filter, no retouching. Centered head and shoulders, official biometric framing.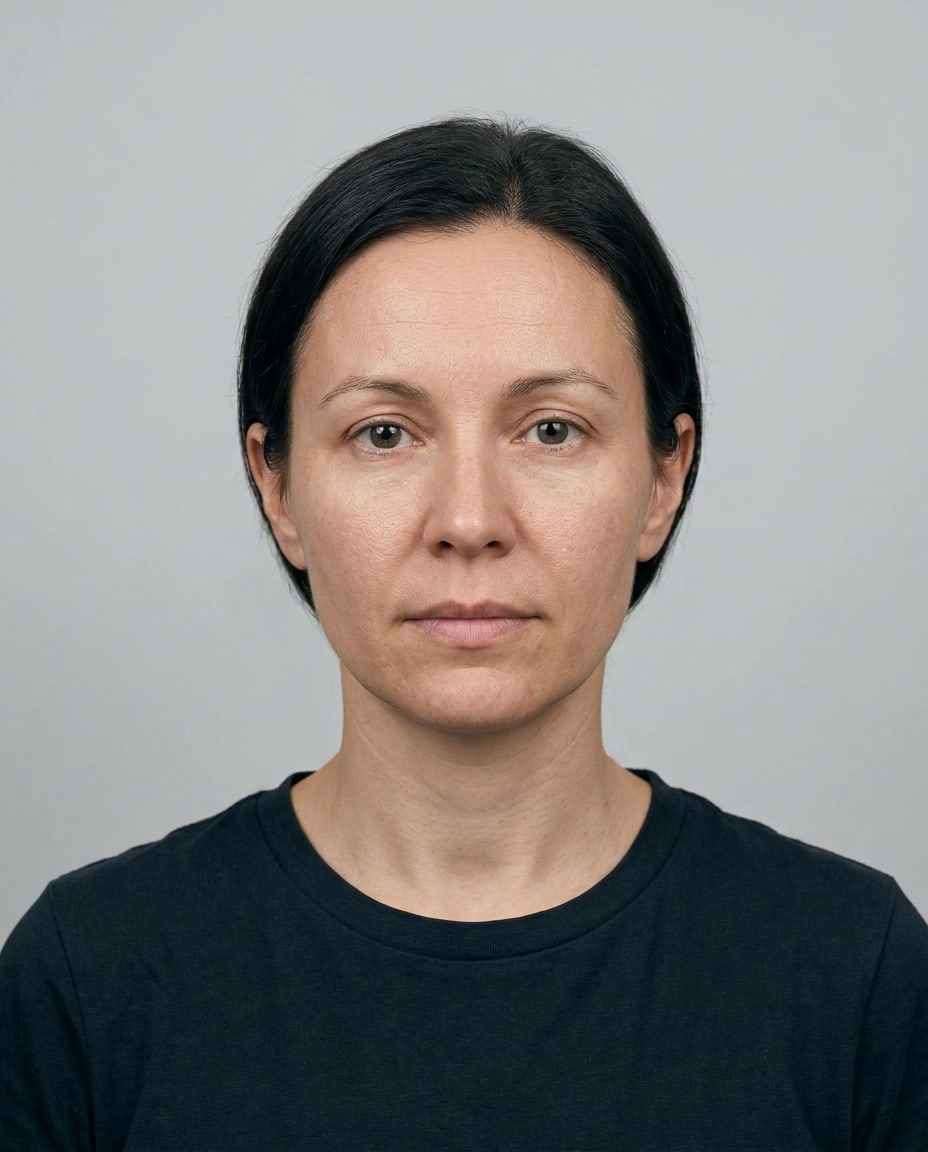
Gemini (Nano Banana 2.1) output, generated with this code.
In the result, the face looks straight ahead, the ears are as visible as possible and the background is a single color. Don't add a hat or thick frames that would cover the hairline. If you wear glasses, replace the no glasses glare line with thin metal glasses, no reflection in the lenses.
LinkedIn and résumé portrait
One step warmer than an ID photo. Still simple, but with a shoulder pose and a very slight smile.
Professional headshot of a [30-year-old software engineer], slight natural smile, looking into the lens. Wearing a [navy knit sweater / light blue shirt]. Soft window light from the left, clean off-white background, shallow depth of field. 85mm lens, f/2.8, natural skin texture, visible pores, no plastic skin, no heavy makeup, editorial LinkedIn portrait.
Gemini (Nano Banana 2.1) output, generated with this code.
Change the profession and clothing in the brackets. Don't write a busy office into the background. In this framing, the plainer the background stays, the more the face stands out. When generating the same person a second time, keep the clothing sentence fixed. That way, when the two shots are placed side by side, they look like the same person.
Student and internship applications
A younger face, still formal. Don't ask for school badges, logos or text. The model prints text crooked.
Clean student portrait of a [university student], calm expression, direct gaze. Simple [white collared shirt], hair tidy and away from the eyes. Soft even lighting, pale blue-grey background, no text, no logo, no watermark. 85mm, f/4, natural skin, realistic eyes, head-and-shoulders crop.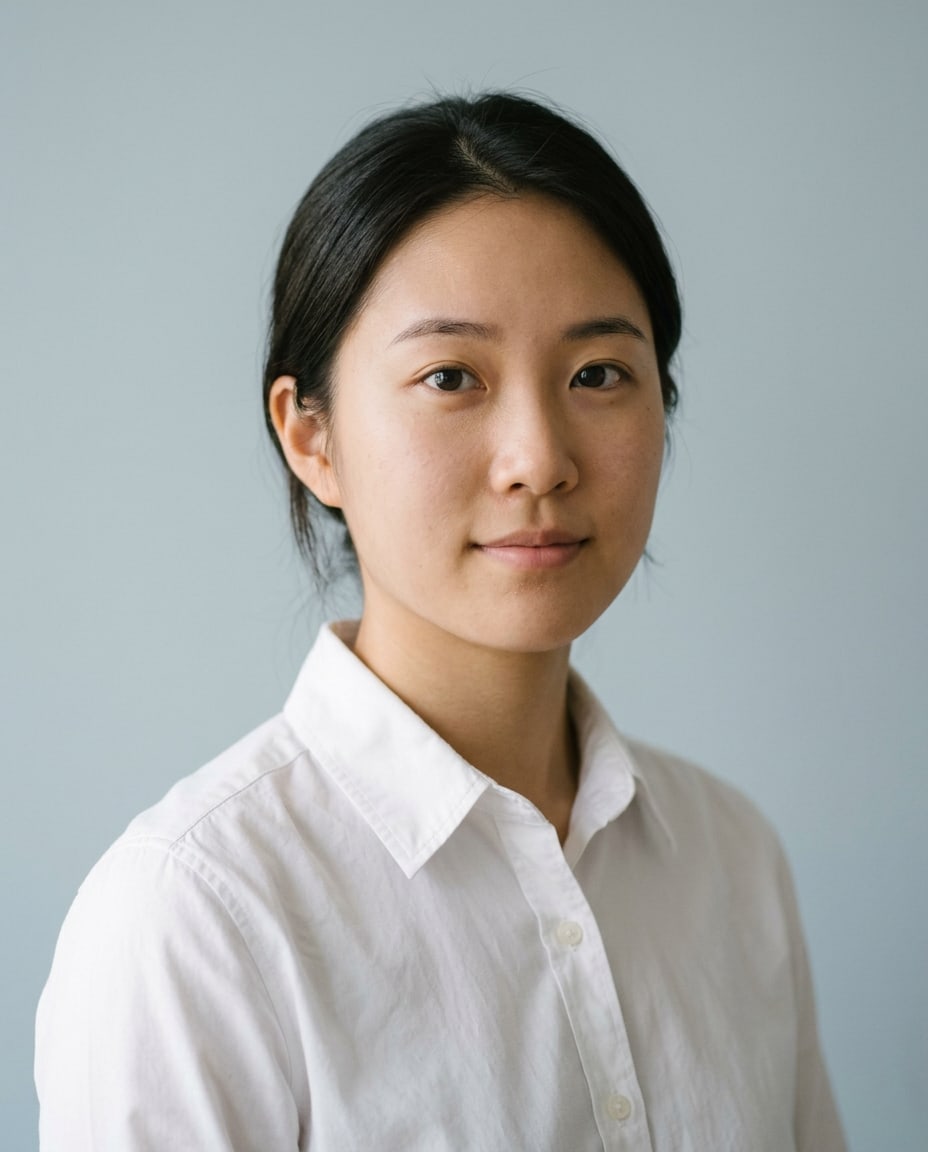
Gemini (Nano Banana 2.1) output, generated with this code.
Keeping the same face in a second shot
If you can't reference the first shot in the second request, copy the unchanging part of the description: age range, hair, skin tone, clothing, background. Let lighting be the only line that changes. The phrase same person, consistent face doesn't always guarantee the same face. For consistency, narrow the description; don't ask for five different emotions at once.
If the light comes from the left, write it the same way in every code. Using window light in one shot and a studio flash in another turns the face into someone else. Fix the background color too. Light grey versus cream looks like a small difference on screen. But the facial features drift along with that difference.
Three things that often break
Don't ask for text, flags or institutional logos in the frame. If headphones, a hat or a hand are in front of the face, the ID photo is ruined. Praise like ultra beautiful, perfect skin makes the skin plastic. Keep natural skin texture, visible pores instead.
If you want hands and shoulders, write that separately. If you don't, the model crops the frame at the chest or pushes one shoulder out. In an ID photo both shoulders should be visible and the arms should stay out of the frame.
Background color and cropping
Light grey is the background that springs the fewest surprises for most practice runs. Pure white melts the edges if the hair is light-colored. Dark navy looks serious but makes the face look smaller at ID-photo size. Don't ask for three backgrounds in one prompt. Pick one, and if you don't like it, change only the background sentence and run the same description again.
The crop should end at the shoulders. Leave a little room above the head. You can write that room separately as small gap above the head, both shoulders in frame. This line helps if the model crops at the chest. If the chin gets cut off, add chin fully visible. If the ears are covered by hair, don't try to fix it. Describing the hair as tucked behind the ears invents a hairstyle that doesn't exist.
Glasses, beard and age
Reflections on glasses lenses are the most common thing to go wrong. If no glasses glare isn't enough, write lenses fully transparent, eyes clearly visible behind the glasses. Don't ask it to remove the glasses entirely. Then the face changes too. If there's a beard, describe its shape: short, scruffy or a thin line. If you write clean shaven, the model deletes the beard and redraws the jawline.
Think of age not as a single number but as a decade-wide range. 28-year-old sometimes produces a younger face. adult in their late twenties varies less. Photos of children are not what these codes are for. Don't give a request that describes a minor.
What you should save
Keep the complete code that worked in a note. When the chat title gets lost, the lighting sentence goes with it. Regenerating the same person in the second week works thanks to this note. Delete the shots you don't like. Ten attempts in a row don't improve the description. If after three attempts the face is still someone else, narrow the description; don't add praise.
These codes don't replace a studio shoot. They are a quick start for résumés, school form practice runs and profiles. For official documents, separately check the size and recency rules required by the institution.